Running Code in Sequence
In today’s advanced scripting tutorial, we’re going to talk about the Task Scheduler. The Task Scheduler gives you the power to control exactly when your code runs, which opens up all sorts of possibilities.
I’ve placed some parts here in the world to help us understand what’s going on. This part here represents task one, and this part here represents task two. Right now, they just sit here and wait to be run. When our script starts, task one runs, and then once it finishes, task two runs. It’s very simple. We’re executing code from top to bottom.
Waiting Between Tasks
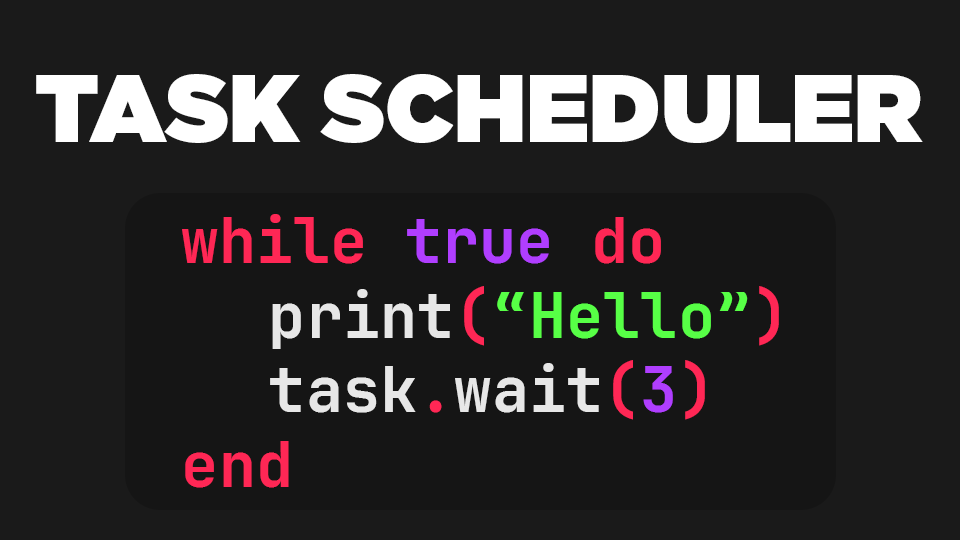
But what if we want to wait in between task one and task two? Well, that’s where task.wait comes in. Now task one will run, then we’ll pause for three seconds, and then task two will run. This is an example of a blocking delay. When we run this code, it stops here and does nothing for three seconds before continuing.
Here’s an example:
while true do
	print("Hello world!")
	task.wait(3)
end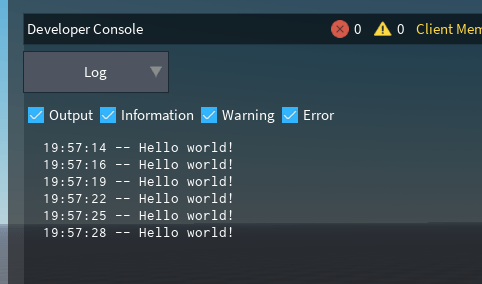
Delayed Execution in the Background
But what if we want to run task three, and we want it to run in the background and not hold up the rest of the code? Let’s place task three down here. Now what we want to do is run task one, then task two, and then three seconds later, we want task three to run.
But we don’t want to just wait for three seconds before running task three, because that would block the rest of the code. Instead, we use task.delay. When we use task.delay, the code continues executing, and then three seconds later, our delayed task runs. Perfect.
Cancelling a Scheduled Task
Now let’s say that task three isn’t allowed to run anymore. We can cancel it. Just store the delay in a variable and then pass that into task.cancel. That will stop it from running if it hasn’t started yet.
Running Multiple Tasks Simultaneously
Alright, what if we want task four and task five to run at the same time? If we just write a while loop and then a for loop, the for loop will never run. That’s because we’re stuck in the while loop. We can fix this by spawning a new thread using task.spawn.
Now the while loop runs in its own thread, and our for loop runs in the main thread. They can now both run at the same time. Once we’re done with the for loop, we can set a variable to false to stop the while loop.
Comparing Delay and Spawn
Now you might think that task.spawn is just a faster version of task.delay, but that’s not entirely true. Let’s run a quick test. We’ll delay a print, and then we’ll spawn a print, and then we’ll just print something in the main thread.
When we run this, we can see that the main thread executes first, then the spawned thread, and then finally the delayed thread. So delay isn’t just a slow version of spawn—they have different behaviors.
Using task.defer for Low-Priority Tasks
Let’s add one more to the test. We’ll use task.defer. Defer is like a mix between delay and spawn. It runs in its own thread but only after the current thread has finished executing. This makes it perfect for scheduling low-priority tasks that shouldn’t get in the way of your main code.
To show this more clearly, let’s write a loop that prints out 10,000 lines. Then we’ll schedule a deferred print, a delayed print, and a spawned print. When we run the code, we can see that the main thread finishes first, then the deferred thread runs, then the spawned thread, and finally the delayed thread.
Summary of Task Scheduler Functions
Now that we’ve seen them all in action, let’s review what each one does by example and behavior.
We use task.wait to pause the current thread. We use task.delay to schedule a background task to run later. We use task.cancel to stop a delayed task before it runs. We use task.spawn to create a new thread that runs immediately. And we use task.defer to create a new thread that runs after the current one finishes.
Thanks for watching, and I’ll see you in the next blog.