Welcome to the final part of our blog series on Lua scripting for Roblox! In this post, we’re going to explore advanced game mechanics, event-driven programming, and troubleshooting your scripts. By the end of this post, you’ll have the knowledge to take your Roblox games to the next level. Let’s dive in!
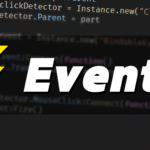
Understanding Event-Driven Programming
Event-driven programming is a core concept in Roblox scripting. It allows you to make your game interactive by responding to events, such as when a player clicks a button, touches an object, or when something happens in the game world (like an object’s health decreasing).
In Roblox, most interactions are event-driven. Events are signals sent by objects that something has happened, and you can respond to them by using event listeners. Let’s look at how to work with events in Roblox.
Working with Events
In Roblox, events are used to trigger functions when something specific occurs. For example, when a player touches a part, we can trigger an event to perform an action, such as playing a sound, changing the part’s color, or even scoring points.
Let’s see an example of how to listen for a part being touched and then trigger an event:
local part = game.Workspace.Part  -- Reference to the part you want to interact with

part.Touched:Connect(function(hit)
    local player = game.Players:GetPlayerFromCharacter(hit.Parent)
    if player then
        print(player.Name .. " touched the part!")
        -- You can add additional actions here, such as giving the player points or triggering an effect
    end
end)
In this script:
Touched: This is an event that fires when a part is touched by any object.Connect(function()): This is how we create an event listener to respond when the event occurs. In this case, it listens for when the part is touched.GetPlayerFromCharacter(hit.Parent): We check if the object touching the part is a player’s character.
Using Custom Events
Sometimes, you might want to trigger events that you’ve created yourself. Roblox allows you to define and use custom events within your scripts. Custom events are helpful when you need to communicate between different parts of your game or scripts.
Here’s an example of creating and firing a custom event:
-- Create a custom event
local customEvent = Instance.new("BindableEvent")

-- Define the function to respond to the event
customEvent.Event:Connect(function(player)
    print(player.Name .. " triggered the custom event!")
    -- You can add more actions to perform here, such as awarding points, spawning enemies, etc.
end)

-- Fire the custom event
customEvent:Fire(game.Players.LocalPlayer)
In this example:
BindableEvent: This creates a new custom event that we can use to trigger specific actions in your game.Event:Connect(function()): This connects the event to a function that runs when the event is fired.Fire(): This is how you manually fire the event, which triggers any connected functions.
Custom events are useful for creating more modular and reusable game logic, as you can trigger the event from different scripts and handle it in one central location.
Building Advanced Game Mechanics
Now that you’re familiar with events, let’s move on to more advanced game mechanics. These mechanics will add depth and complexity to your Roblox games, making them more engaging for players.
Timers and Delays
Timers are essential when you want to introduce delays or timed actions in your game, such as spawning enemies, triggering events after a delay, or creating countdowns. Roblox’s wait() function and delay() function are your go-to tools for handling timing.
Here’s an example of how to use a timer to delay an action:
local function spawnEnemy()
    print("Enemy spawned!")
    -- Add code here to spawn an enemy or perform an action
end

-- Wait for 5 seconds before calling the function
wait(5)
spawnEnemy()
In this script:
wait(seconds): This function pauses the script for a specified number of seconds before continuing with the next line of code.spawnEnemy(): This is a function that will be called after a 5-second delay.
Alternatively, you can use delay() to run a function after a delay without blocking the rest of your code from executing:
delay(5, spawnEnemy)This also calls spawnEnemy() after a 5-second delay but allows other actions to continue running in parallel.
Creating and Managing NPCs (Non-Player Characters)
NPCs are a common game mechanic in many Roblox games. You can create NPCs using models and then control their behavior through scripts. Let’s create a basic NPC that moves toward the player when they are within a certain distance.
Here’s how you can script an NPC that moves towards the player:
local npc = game.Workspace.NPC  -- Reference to the NPC model
local players = game.Players:GetPlayers()

local function moveToPlayer(npc, player)
    local humanoid = npc:FindFirstChild("Humanoid")
    if humanoid then
        local playerPos = player.Character.HumanoidRootPart.Position
        humanoid:MoveTo(playerPos)  -- Move the NPC to the player's position
    end
end

-- Detect when a player is close to the NPC and move the NPC toward them
while true do
    for _, player in ipairs(players) do
        if player.Character then
            local distance = (npc.HumanoidRootPart.Position - player.Character.HumanoidRootPart.Position).Magnitude
            if distance < 20 then  -- If the player is within 20 studs of the NPC
                moveToPlayer(npc, player)
            end
        end
    end
    wait(1)
end
In this script:
HumanoidRootPart: This is the central part of the NPC or character that we can use to calculate distances and move them around.MoveTo(): This function tells the NPC’s humanoid to move to a specific position.
This basic NPC can be expanded to include more complex behaviors, such as attacking players, following specific paths, or even talking to the player using Chat commands.
Debugging and Troubleshooting
As you work on more complex Roblox scripts, you’ll inevitably run into bugs or unexpected behavior. Debugging is a key skill in game development. Here are a few tips to help you troubleshoot your scripts:
- Use
print()Statements: The easiest way to check the flow of your script and identify where things are going wrong is to insertprint()statements. For example:
print("Starting the function")This will output the message to the console, helping you trace your code execution.
- Check the Output Window: Roblox Studio has an Output window that shows errors and warnings. Pay attention to these messages as they can point you directly to the issue in your script.
- Use Breakpoints: Breakpoints are useful when you want to pause your script at a specific line to inspect variables and the game state. You can set a breakpoint in Roblox Studio by clicking on the line number in the script editor.
- Test in Play Mode: Always test your scripts in Play mode to make sure everything works as expected. If something isn’t working, use the Developer Console (
F9) to see if any errors are being thrown.
Next Steps
Now that you have mastered events, advanced game mechanics, and debugging techniques, you’re well on your way to becoming a Roblox scripting expert! With these tools at your disposal, you can create a wide range of games and interactive experiences.
In the future, you can explore topics like AI scripting, creating multiplayer features, working with data persistence, and even optimizing your game for better performance.
Thank you for following our blog series on Lua scripting for Roblox! We hope you now feel confident in your scripting abilities and ready to create your own amazing games. Keep experimenting, keep learning, and, most importantly, have fun!
Happy coding, and may your Roblox creations shine!