Welcome back to part two of our blog series on coding in Lua for Roblox scripting! In this post, we’ll take a deeper dive into more advanced concepts, like working with Roblox objects, handling player input, and utilizing the Roblox API to bring your game to life. If you’re already comfortable with the basics from the first post, it’s time to start creating more dynamic and interactive experiences!
Working with Roblox Objects
In Roblox, nearly everything in your game is an object. Whether it’s a part, a model, a character, or even the user interface, objects are the building blocks of your game. Understanding how to manipulate these objects is crucial for your scripting success.
Creating and Manipulating Parts
In Roblox Studio, parts are the primary objects used to build structures, vehicles, and even characters. Here’s a quick guide to create and manipulate parts via script:
-- Create a new part
local part = Instance.new("Part")
part.Size = Vector3.new(4, 1, 2)  -- Set the part's size
part.Position = Vector3.new(0, 10, 0)  -- Set the part's position
part.Anchored = true  -- Ensure the part doesn't fall due to gravity
part.Parent = game.Workspace  -- Add the part to the game world
Here’s a breakdown of the code:
Instance.new("Part"): This creates a new part.Vector3.new(x, y, z): AVector3is used to define the position and size of the part.Anchored = true: This property keeps the part from falling.part.Parent = game.Workspace: This places the part into the game world.
You can also change properties like Color, Transparency, and Shape to make your parts more interactive or visually interesting.
Working with Models
A model is a collection of parts grouped together. You can manipulate entire models the same way you manipulate individual parts.
-- Create a model
local model = Instance.new("Model")
model.Name = "MyModel"
model.Parent = game.Workspace

-- Create parts and add them to the model
local part1 = Instance.new("Part")
part1.Size = Vector3.new(2, 1, 2)
part1.Position = Vector3.new(0, 10, 0)
part1.Parent = model

local part2 = Instance.new("Part")
part2.Size = Vector3.new(2, 1, 2)
part2.Position = Vector3.new(0, 5, 0)
part2.Parent = model
By grouping parts into a model, you can move them around, change their properties, or even clone and manipulate them as a unit. Models are great for creating structures like buildings, vehicles, and more complex objects.
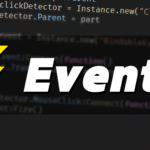
Handling Player Input
One of the most powerful aspects of Roblox scripting is the ability to handle player input. Whether you want to create a button, detect when a player clicks, or respond to keyboard presses, Roblox provides several ways to interact with the player.
Mouse Input
To respond to mouse clicks and movement, Roblox provides the Mouse object, which is part of the Player object. Here’s an example of how to detect when a player clicks on a part:
-- Detect when a player clicks a part
local part = game.Workspace.Part  -- Reference to the part you want to interact with

part.Touched:Connect(function(hit)
    local player = game.Players:GetPlayerFromCharacter(hit.Parent)
    if player then
        print(player.Name .. " clicked the part!")
    end
end)
In this example:
Touchedevent: Fires when a part is touched by another object. We check if the object that touched the part is a player’s character.GetPlayerFromCharacter(hit.Parent): This function helps us identify the player who interacted with the part.
Keyboard Input
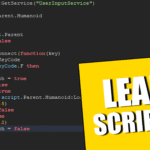
You can also detect keyboard input using the UserInputService. This service allows you to capture key presses, mouse clicks, and even gamepad inputs.
local UserInputService = game:GetService("UserInputService")

-- Detect when the player presses the "W" key
UserInputService.InputBegan:Connect(function(input, gameProcessed)
    if gameProcessed then return end  -- Ignore input if it's already processed (e.g., in the chat)

    if input.KeyCode == Enum.KeyCode.W then
        print("W key pressed!")
    end
end)
This script detects when the player presses the “W” key and prints a message. You can replace Enum.KeyCode.W with any key you want to listen for, or even capture mouse movements and clicks.
Advanced Roblox API Concepts
Roblox provides a vast API (Application Programming Interface) that gives you access to game features like player data, game services, physics, and more. Let’s take a look at some of the more powerful tools at your disposal.
Player and Character Management
Roblox makes it easy to interact with players and their characters. Here’s an example of how to give a player some in-game currency when they join the game:
game.Players.PlayerAdded:Connect(function(player)
    -- Give the player some starting currency
    local leaderstats = Instance.new("Folder")
    leaderstats.Name = "leaderstats"
    leaderstats.Parent = player

    local coins = Instance.new("IntValue")
    coins.Name = "Coins"
    coins.Value = 100  -- Starting coins
    coins.Parent = leaderstats
end)
This code listens for when a player joins the game and gives them 100 coins stored in a leaderstats folder, which is the standard for storing player stats like money, level, etc.
Creating GUIs (Graphical User Interfaces)
User interfaces (UI) are essential for interacting with players through menus, buttons, and information displays. Roblox uses ScreenGui to create UI elements. Here’s an example of a simple button that makes a player’s character jump when clicked:
local player = game.Players.LocalPlayer
local mouse = player:GetMouse()

-- Create the button
local screenGui = Instance.new("ScreenGui")
screenGui.Parent = player.PlayerGui

local button = Instance.new("TextButton")
button.Size = UDim2.new(0, 200, 0, 50)
button.Position = UDim2.new(0.5, -100, 0.5, -25)
button.Text = "Jump!"
button.Parent = screenGui

-- Define the button click function
button.MouseButton1Click:Connect(function()
    player.Character:FindFirstChild("Humanoid"):ChangeState(Enum.HumanoidStateType.Physics)
    player.Character:FindFirstChild("Humanoid"):Move(Vector3.new(0, 50, 0))  -- Jump effect
end)
This script creates a button on the player’s screen and allows them to trigger an action (jumping) when the button is clicked.
Next Steps
You’ve now explored more advanced Lua concepts for Roblox, from working with objects and handling player input to manipulating the player’s data and creating UI. With these tools at your disposal, you can begin to create more complex and interactive game mechanics.
In the next blog post, we’ll focus on working with events and advanced game logic, such as creating custom events, handling timers, and building dynamic environments. You’ll also learn how to troubleshoot and debug your scripts to make sure everything runs smoothly.
Stay tuned for the final part of our guide, where we’ll cover event-driven programming and advanced game mechanics in Roblox!
Happy coding, and keep building your dream games in Roblox!